Fragment: -It is a modular section of an activity which has its own lifecycle.We can add or remove fragment in an activity while activity is running.We can combine multiple fragments in a single activity to build a multi-pane UI.


Step 1: -In your project go to activity.xml and type the below code.
<?xml version="1.0" encoding="utf-8"?>
<FrameLayout xmlns:android="http://schemas.android.com/apk/res/android"
    android:id="@+id/fragment_container"
    xmlns:tools="http://schemas.android.com/tools"
    android:layout_width="match_parent"
    android:layout_height="match_parent"
    tools:context="com.example.hp.myfragment.MainActivity">

</FrameLayout>
Step 2: -Create a java class.Here I am giving it name
ArticleContentpackage com.example.hp.myfragment;
/**
* Created by hp on 6/5/2017.
*/
public class ArticleContent {
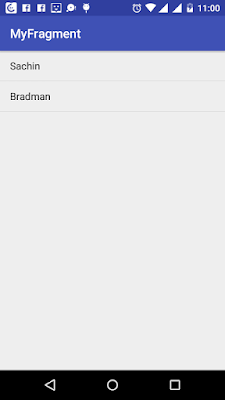
public static final String[] HEADLINES={"Sachin","Bradman"};
public static final String[] ARTICLES={"Sachin Data","Bradman Data"};
}
Step 3: -Create a new XML and give it a name.I am giving it a name.To create it go to res→layout→new→layout resource file.
Articleview.xml<?xml version="1.0" encoding="utf-8"?>
<ScrollView xmlns:android="http://schemas.android.com/apk/res/android"
android:orientation="vertical"
android:layout_width="match_parent"
android:layout_height="match_parent">
<TextView
android:id="@+id/article"
android:layout_width="match_parent"
android:layout_height="match_parent"
android:textSize="18sp"
android:padding="16dp"
android:textColor="#000000"/>
</ScrollView>
Step 4: -Create another java class and give it the name.To create java class goes to res→java→in MainActivity right click on main activity new go to java class.
HeadLineFragment
package com.example.hp.myfragment;

import android.content.Context;
import android.os.Bundle;
import android.support.v4.app.ListFragment;
import android.view.View;
import android.widget.ArrayAdapter;
import android.widget.ListView;

/**
 * Created by hp on 6/5/2017.
 */

public class HeadLinesFragment extends ListFragment {
    public OnHeadLinesSelectedListener selectedListener;
    public interface  OnHeadLinesSelectedListener{
        void onArticleSelected(int position);
    }

    @Override
    public void onCreate( Bundle savedInstanceState) {
        super.onCreate(savedInstanceState);
        setListAdapter(new ArrayAdapter<String>(getActivity(),android.R.layout.simple_list_item_1, ArticleContent.HEADLINES));
    }

    @Override
    public void onStart() {
        super.onStart();
        getListView().setSelector(R.drawable.color_on_click);
    }

    @Override
    public void onAttach(Context context) {
        super.onAttach(context);
        selectedListener=(MainActivity)context;
    }

    @Override
    public void onListItemClick(ListView l, View v, int position, long id) {
        l.setSelected(true);
        selectedListener.onArticleSelected(position);
    }

    }
Step 5: - It's time to create another activity.xml but that time its orientation is landscape.Its name is same as that of the original activity.xml but it work when orientation change that is from portrait to landscape.
land|\activity.xml
<?xml version="1.0" encoding="utf-8"?>
<LinearLayout xmlns:android="http://schemas.android.com/apk/res/android"
    android:orientation="horizontal"
    android:layout_width="match_parent"
    android:layout_height="match_parent">

    <fragment
    android:id="@+id/headlines_fragment"
        android:name="com.example.hp.myfragment.HeadLinesFragment"
        android:layout_width="0dp"
        android:layout_height="match_parent"
        android:layout_weight="1"/>
    <FrameLayout
        android:id="@+id/article_layout"
        android:layout_width="0dp"
        android:layout_height="match_parent"
        android:layout_weight="2"
        android:background="@color/white"
         style="@style/Divider"/>

</LinearLayout>
Step 6: -Now create a java class and give it the name.
ArticalFragment.javaimport android.os.Bundle;
import android.support.annotation.Nullable;
import android.support.v4.app.Fragment;
import android.view.LayoutInflater;
import android.view.View;
import android.view.ViewGroup;
import android.widget.TextView;
/**
* Created by hp on 6/5/2017.
*/
public class ArticleFragment extends Fragment {
private View view;
@Override
public View onCreateView(LayoutInflater inflater, ViewGroup container, Bundle savedInstanceState) {
view=inflater.inflate(R.layout.article_view,container,false);
return view;
}
@Override
public void onStart() {
super.onStart();
Bundle bundle=getArguments();
if(bundle!=null){
String data=ArticleContent.ARTICLES[bundle.getInt("position")];
TextView textView=(TextView)view.findViewById(R.id.article);
textView.setText(data);
}
}
}
Step 7: - To create partitioning effect need to write code in style.xml file.
<resources>

    <!-- Base application theme. -->
    <style name="AppTheme" parent="Theme.AppCompat.Light.DarkActionBar">
        <!-- Customize your theme here. -->
        <item name="colorPrimary">@color/colorPrimary</item>
        <item name="colorPrimaryDark">@color/colorPrimaryDark</item>
        <item name="colorAccent">@color/colorAccent</item>
    </style>
    <style name="Divider">
        <item name="android:layout_width">match_parent</item>
        <item name="android:layout_height">1dp</item>
        <item name="android:background">@color/colorAccent</item>

    </style>

</resources>
Step 8: -Now go to MainActivity.java and type code mention below.
package com.example.hp.myfragment;

import android.app.FragmentManager;
import android.content.res.Configuration;
import android.nfc.Tag;
import android.support.v4.app.FragmentTransaction;
import android.support.v7.app.AppCompatActivity;
import android.os.Bundle;
import android.util.Log;

public class MainActivity extends AppCompatActivity implements HeadLinesFragment.OnHeadLinesSelectedListener {

    @Override
    protected void onCreate(Bundle savedInstanceState) {
        super.onCreate(savedInstanceState);
        setContentView(R.layout.activity_main);
       /* HeadLinesFragment headLinesFragment=new HeadLinesFragment();
        getSupportFragmentManager().beginTransaction().add(R.id.fragment_container,headLinesFragment).commit();*/
        if(findViewById(R.id.fragment_container)!=null){
            if (savedInstanceState!=null){
                return;
            }
            HeadLinesFragment headLinesFragment=new HeadLinesFragment();
            getSupportFragmentManager().beginTransaction().add(R.id.fragment_container,headLinesFragment).commit();
        }
    }

    @Override
    public void onArticleSelected(int position) {
        ArticleFragment articleFragment=new ArticleFragment();
        Bundle bundle=new Bundle();
        bundle.putInt("position",position);
        articleFragment.setArguments(bundle);
        FragmentTransaction transaction=getSupportFragmentManager().beginTransaction();
        /*transaction.replace(R.id.fragment_container , articleFragment);
        transaction.addToBackStack(null);
        transaction.commit();
*/
        if (findViewById(R.id.article_layout)!=null){
            transaction.replace(R.id.article_layout,articleFragment);
        }else {
            transaction.replace(R.id.fragment_container , articleFragment);
            transaction.addToBackStack(null);
        }
        transaction.commit();
    }


    }


No comments:
Post a Comment